Having proper knowledge about the components inside your PC can also help you to troubleshoot various problems. So, knowing your PC’s full specification is an important thing. You don’t really need third-party software to check your PC’s full specification.
Check Your PC’s Full Specification On Windows 10
On Windows 10, you can check your device specifications, including Basic Input/Output System, Firmware, Model Number, Processor, Memory, Drive, Graphics, and other things pretty easily. In this article, we are going to share a few methods which can help you to find out the full list of your device hardware and software specifications.
1. Checking Processor, RAM, Device ID & Windows Version
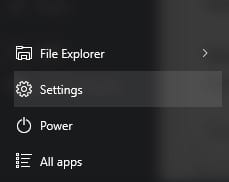
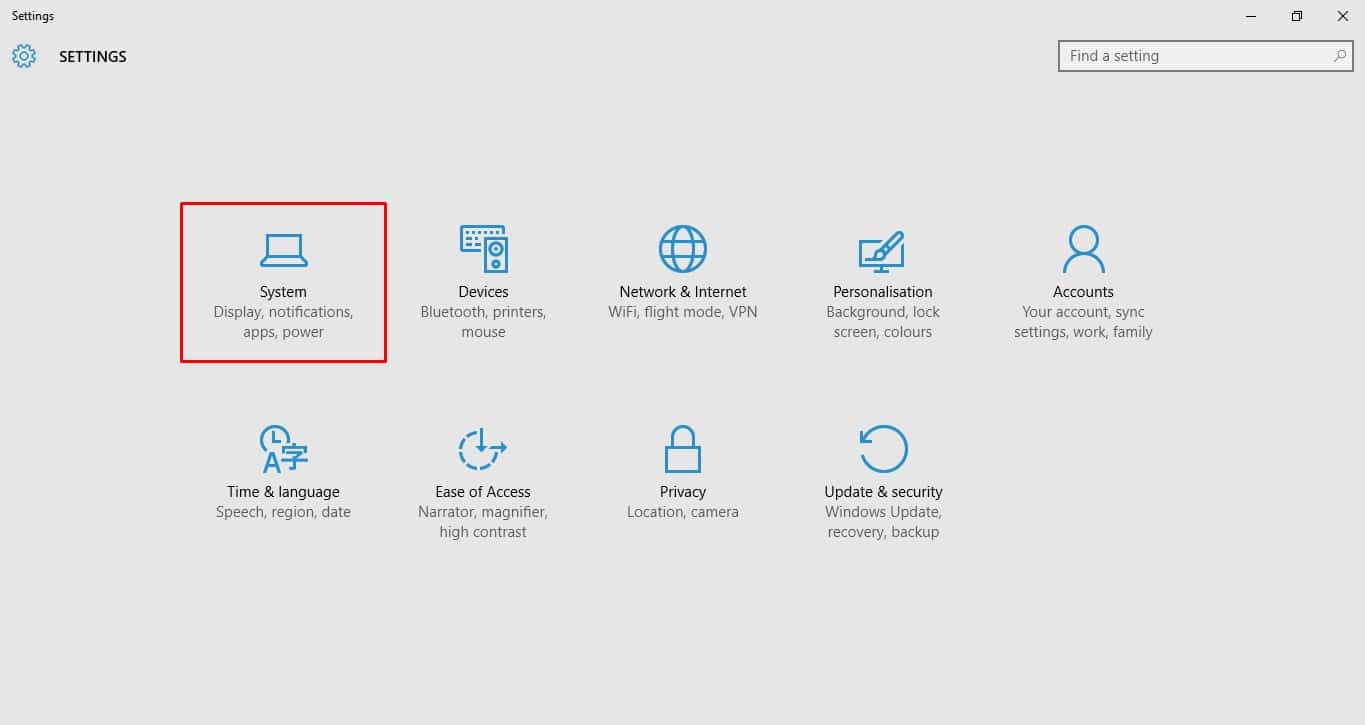
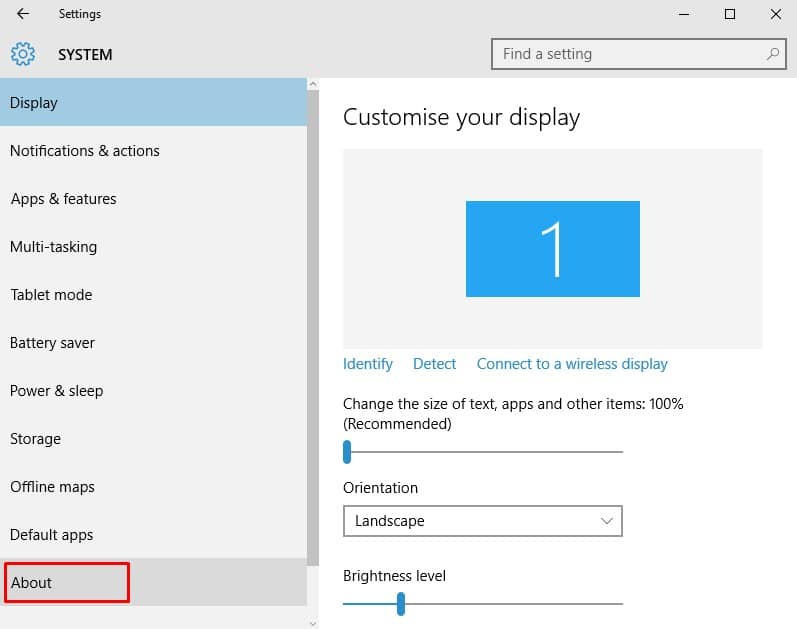
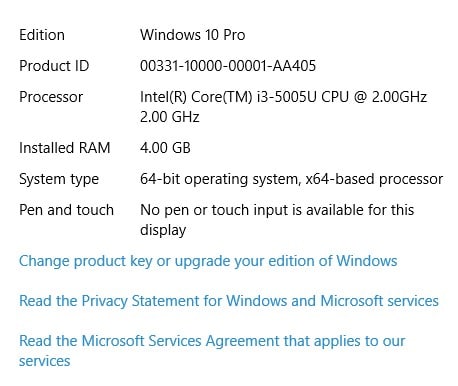
Well, if you want to check some of the basic specs like Processor, RAM, and the current version of your Windows, then you need to follow some of the simple steps given below. Step 1. First of all, click on the Start Button and then select ‘Settings’. Step 2. On the Settings page, you need to click on ‘System’ Step 3. Under the System, click on ‘About’ Step 4. Under the About section, check the ‘Device Specifications’ and ‘Windows Specifications. That’s it, you are done! Under the device specifications, you can check the device name, processor, RAM, etc. The Windows specification section shows the current version of your Windows operating system.
2. Check the Graphic Card (GPU)
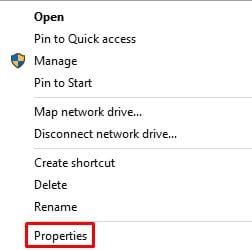
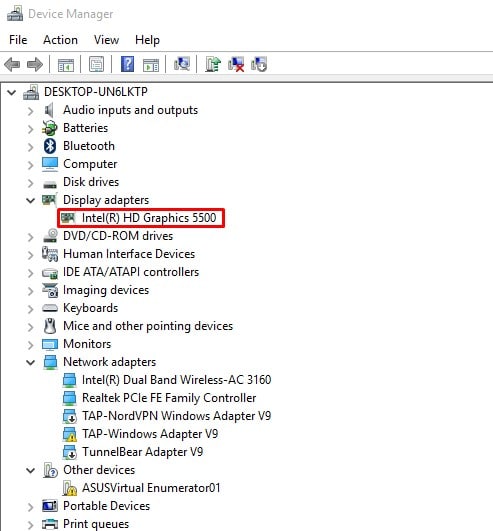
Well, the above method won’t show you what Graphic processor your PC has. To check the GPU that your PC is using, follow some of the simple steps given below. Step 1. First of all, right-click on ‘My Computer’. Step 2. Now click on ‘Properties’ Step 3. Now on the System page, you need to click on ‘Device Manager’ Step 4. There you need to find and expand the ‘Display Adapters’. Your GPU will be listed there.
3. Check the Motherboard
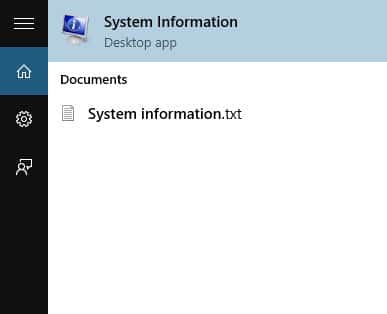
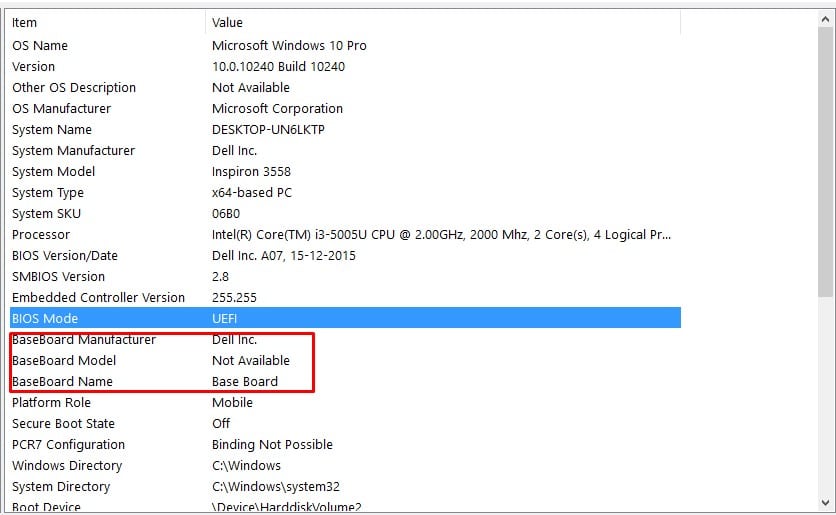
Well, you don’t really need to open the chassis of your PC to check what motherboard you have. You need to follow some of the simple steps given below to check which motherboard your PC is using. Step 1. First of all, open Windows Search bar and type in ‘System information’ Step 2. Open the System Information and scroll down until you find the ‘Motherboard Manufacturer’ or ‘BaseBoard Manufacturer’ Step 3. The Baseboard manufacturer shows the Motherboard company and the Baseboard Model tells the model number. That’s it, you are done! This is how you can check your Motherboard manufacturer and model number on the Windows 10 computer.
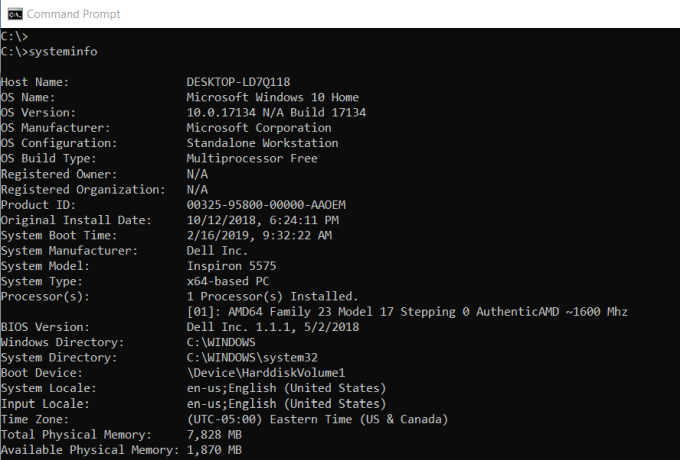
4. Check System Information using Command Prompt
Well, if you don’t want to follow the methods given above, then you can utilize the Windows command prompt to check the system information. Let’s find out how to check system information using Command Prompt on Windows 10. Step 1. First of all, right-click on the Start button and select ‘Command Prompt (Admin)’ Step 2. On the command prompt, type in ‘systeminfo’ and press Enter button. Step 3. Now you will be able to see the system information. For more information, you need to type in ‘systeminfo /?’ That’s it, you are done! This will allow you to view even more details about your computer. These are the best methods to check your PC’s full specifications on Windows 10. If you know any other method to check the system info, let us know in the comment box below. I hope this article helped you! Share it with your friends also.