Windows security is a free security program provided by Microsoft for Windows users. The Windows Security app runs in the background and protects your computer from various security threats such as malware, viruses, ransomware, phishing attacks, etc. It also has a security feature called Windows SmartScreen which many users don’t know. The role of a Windows SmartScreen is to prevent unrecognized apps from starting and running on your Windows 11 system.
What is Windows SmartScreen?
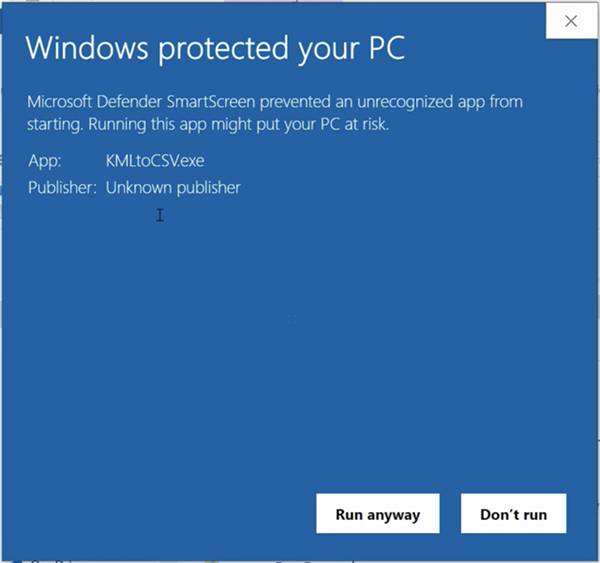
SmartScreen is a security feature introduced in Windows 8, but it has been improved in Windows 10. SmartScreen acts as a filter that gets your download files checked against a Microsoft Database. So, when you download something malicious from the internet and attempt to run it, the SmartScreen filter checks it and blocks it. When it blocks a program from running or making changes to your system, you will see a prompt like this.
Although the feature is excellent, sometimes it blocks safe app use. The only way to run the blocked apps is by clicking on the More info > Run Anyway option. You need to do this every time you want to run an app that Windows Defender SmartScreen blocks. You can disable the Windows Defender SmartScreen feature if you don’t want to do this for apps you trust. However, before disabling the feature, set up a good security app for Windows on your PC.
Ways to Disable Windows Defender SmartScreen on Windows 11
It’s pretty easy to disable Windows Defender SmartScreen on Windows 11, and there are multiple ways to do it. Hence, this article will share the few best practices to disable Windows Defender SmartScreen in Windows 11. Let’s check out.
1) Disable Defender SmartScreen via Windows Security
We will use the Windows Security app to disable the Windows Defender SmartScreen feature in this method. Here’s what you need to do.
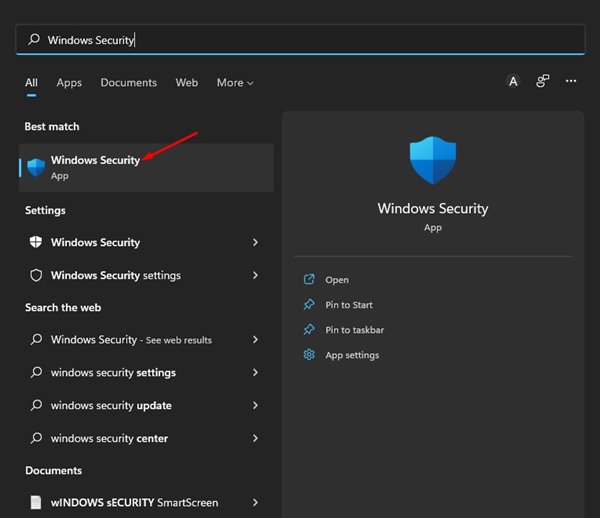
First, click on the Windows 11 search and type in Windows Security. Next, click on Windows Security from the list of options that appears.
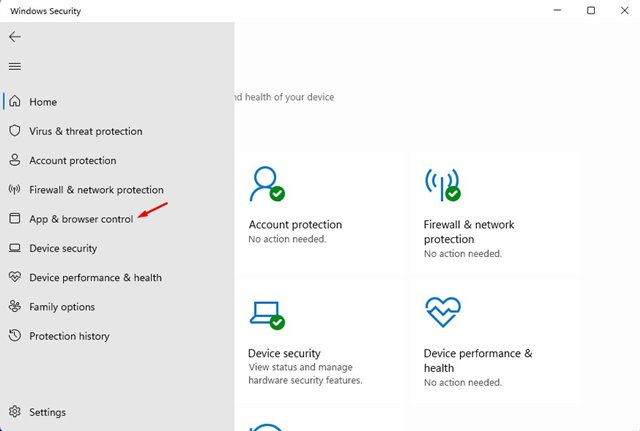
On Windows Security, click on the Apps & browser control.
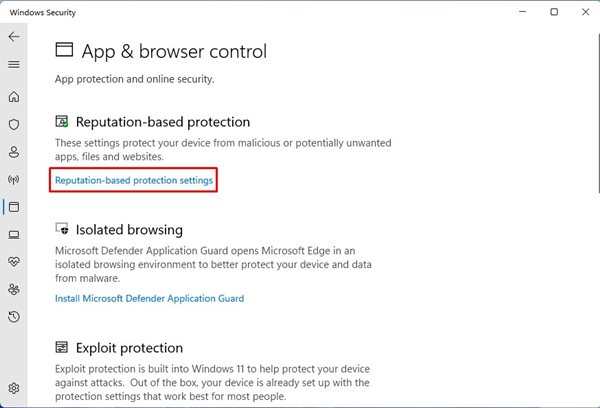
On the right pane, scroll down and click on the Reputation-based protection settings link.
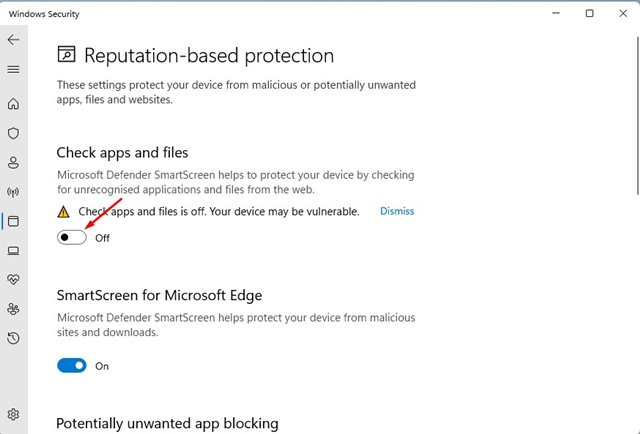
On the next screen, disable the toggle for Check apps and files
You will now see a UAC prompt; click on the Yes button to apply the changes. That’s it! You are done. This is how you can disable the Windows Defender SmartScreen via the Windows Security app.
2) How to Disable SmartScreen for Microsoft Edge
Windows 11 allows you to manage the SmartScreen for the Edge browser separately. Hence, you need to disable the SmartScreen for the Microsoft Edge browser.
First, open the Windows Security app on your Windows 11 PC and click on the App & browser control.
On the right pane, click on the Reputation-based protection settings link.
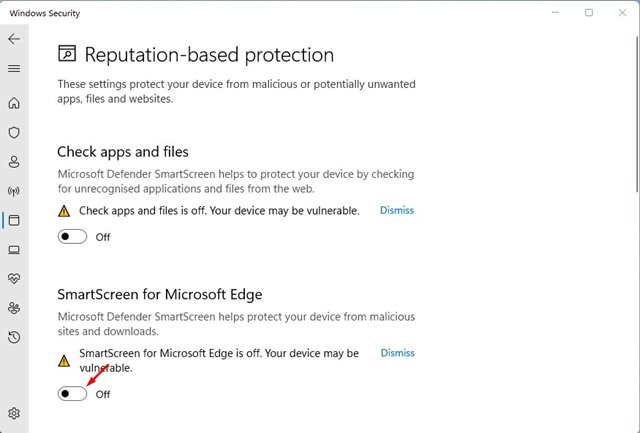
scroll down and disable the toggle for SmartScreen for Microsoft Edge on the next screen.
That’s it! You are done. This is how you can disable SmartScreen for the Microsoft Edge browser on Windows 11.
3) Disable Windows Defenender SmartScreen via Registry
If for some reason, you can’t access the Windows Security app, you can use the Registry Editor to disable the SmartScreen feature. Here’s what you need to do.
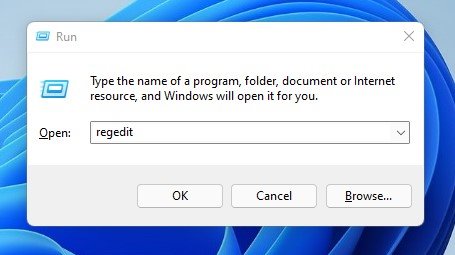
First, press the Windows Key + R button to open the RUN dialog box. On the RUN dialog box, enter regedit and hit the Enter button.
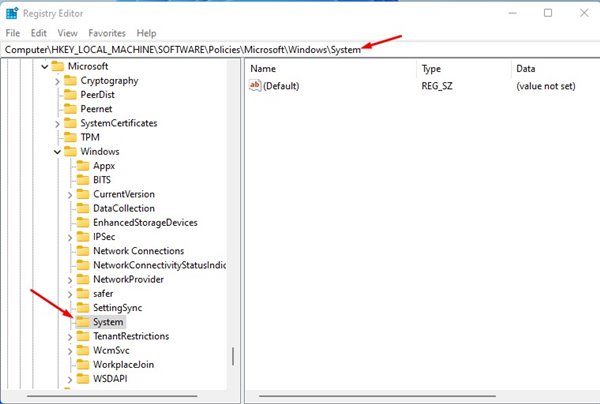
On the Registry Editor, navigate to the path: HKEY_LOCAL_MACHINE\SOFTWARE\Policies\Microsoft\Windows\System
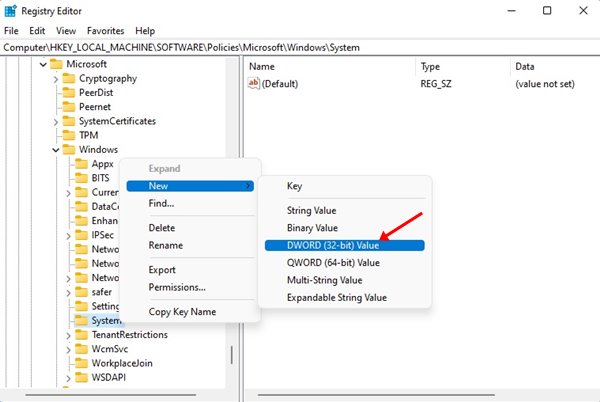
Next, right-click on the System folder and select New > DWORD (32-bit) Value.
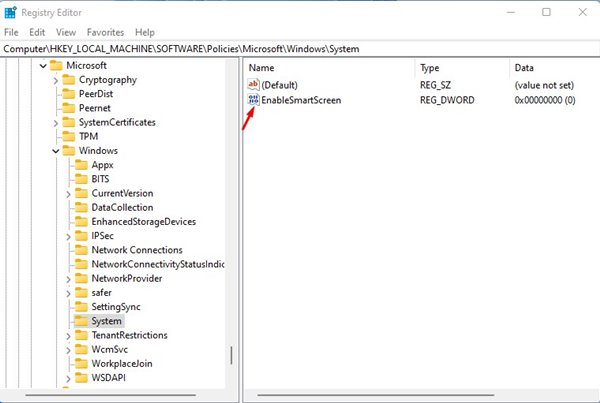
Name the newly created REG_DWORD value as EnableSmartScreen.
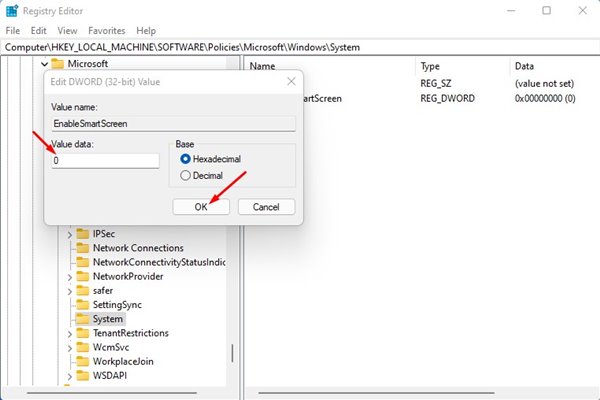
Next, double click on the EnableSmartScreen, set the Value data to 0, and click on the Ok button.
That’s it! You are done. After making the changes, restart your Windows 11 PC. This will disable the Defender SmartScreen on your Windows 11. If you wish to enable the SmartScreen feature again, delete the EnableSmartScreen value you created in Step 4.
4) Disable Windows Defender SmartScreen via Group Policy Editor
You can even use the Local Group Policy Editor to disable the Windows Defender SmartScreen on your Windows 11 computer. Here are some of the simple steps you need to follow.
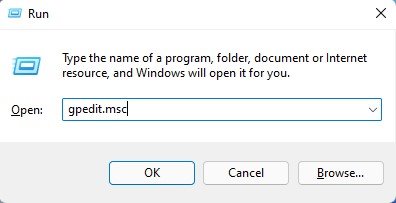
First, press the Windows Key + R button to open the RUN dialog box. On the Run dialog box, type in gpedit.msc and hit the Enter button.
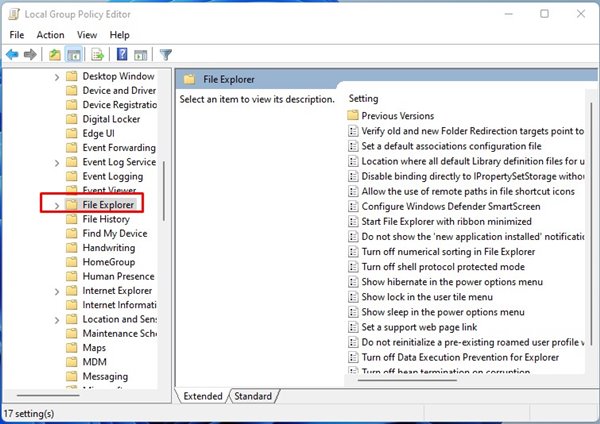
This will open the Local Group Policy Editor. Navigate to the following path: Computer Configuration > Administrative templates > Windows Components > File Explorer
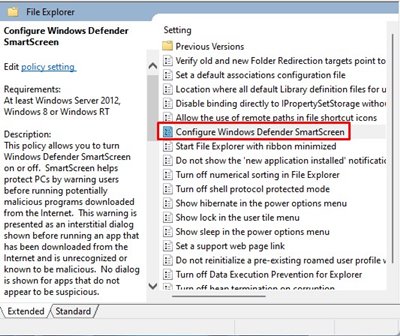
On the right pane, find and double click on the Configure Windows Defender SmartScreen Policy.
On the next Window, select Disabled and click on the Apply button.
That’s it! You are done. After making the above changes, restart your computer. After the restart, the Windows Defender SmartScreen will be disabled. Windows Defender SmartScreen is a great security feature that you shouldn’t turn off. If you still want to turn it off, make sure you use other security programs on your computer. Or else, you can enable the SmartScreen after installing the blocked app again.
