The Night light feature of Windows 10 is designed to filter out harmful blue light from your device’s screen. Also, it applies a warmer color to your screen, which greatly reduces eye strain. On Windows 10, it’s pretty easy to enable the Night Light feature. However, things have changed considerably with Windows 11. The option to adjust the Night light intensity is actually hidden deep under the Settings. Also Read: How to Install Windows 11 From USB (Full Guide)
Steps to Enable the Night Light Feature on Windows 11
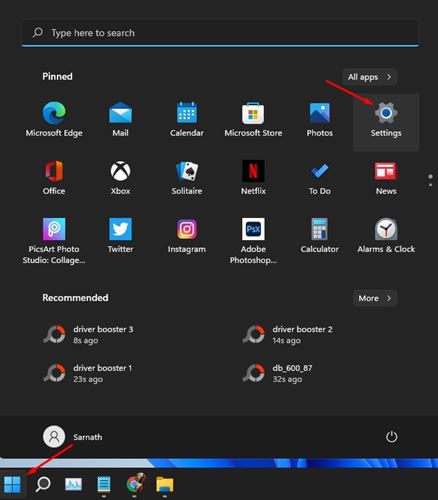
So, if you use computers all day, it’s best to start using the Night Light feature. In this article, we will share a step-by-step guide on how to enable the Night Light feature on Windows 11. Let’s check out. Step 1. First of all, click on the Windows Start button and select ‘Settings.’
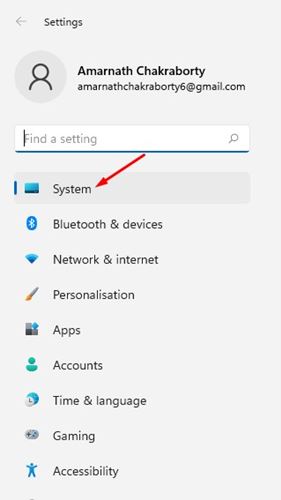
Step 2. On the Settings page, click on the ‘System‘ option.
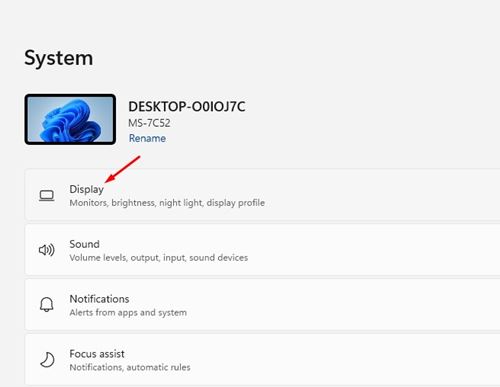
Step 3. On the right pane, click on the ‘Display‘ option.
Step 4. On the next page, enable the toggle button behind Night Light.
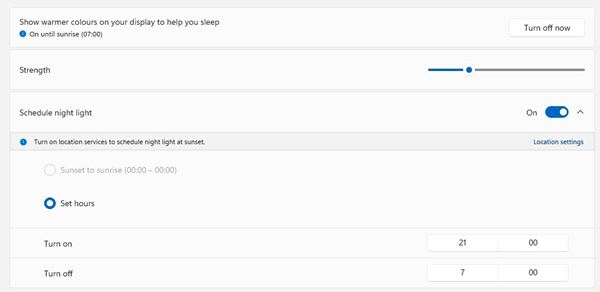
Step 5. Click on the ‘Night Light’ option again. Now you will be able to set the Night Light strength, schedule night light, and more.
That’s it! You are done. This is how you can enable Night Light Feature on Windows 11. Note: After setting up Night Light on Windows 11, you can enable/disable the feature from the taskbar also. Just click on the Network or Sound button, and you will find the Night Light option.
If you are unable to turn on Night Light on Windows 11 due to any reason, you can consider the third-party options. There are many third-party night light apps available for Windows 10. You can use any of them to enable a blue light filter on your desktop screen. So, this article is all about how to enable the Night Light feature on Windows 11. I hope this article helped you! Please share it with your friends also. If you have any doubts related to this, let us know in the comment box below.


